
Printing cheques directly from TallyPrime can save a lot of manual effort and reduce the risk of errors in writing cheque details. Whether you are issuing payments to suppliers, employees, or other parties, TallyPrime’s cheque printing feature makes the process quick, accurate, and professional.
Happy accounting with TallyPrime!
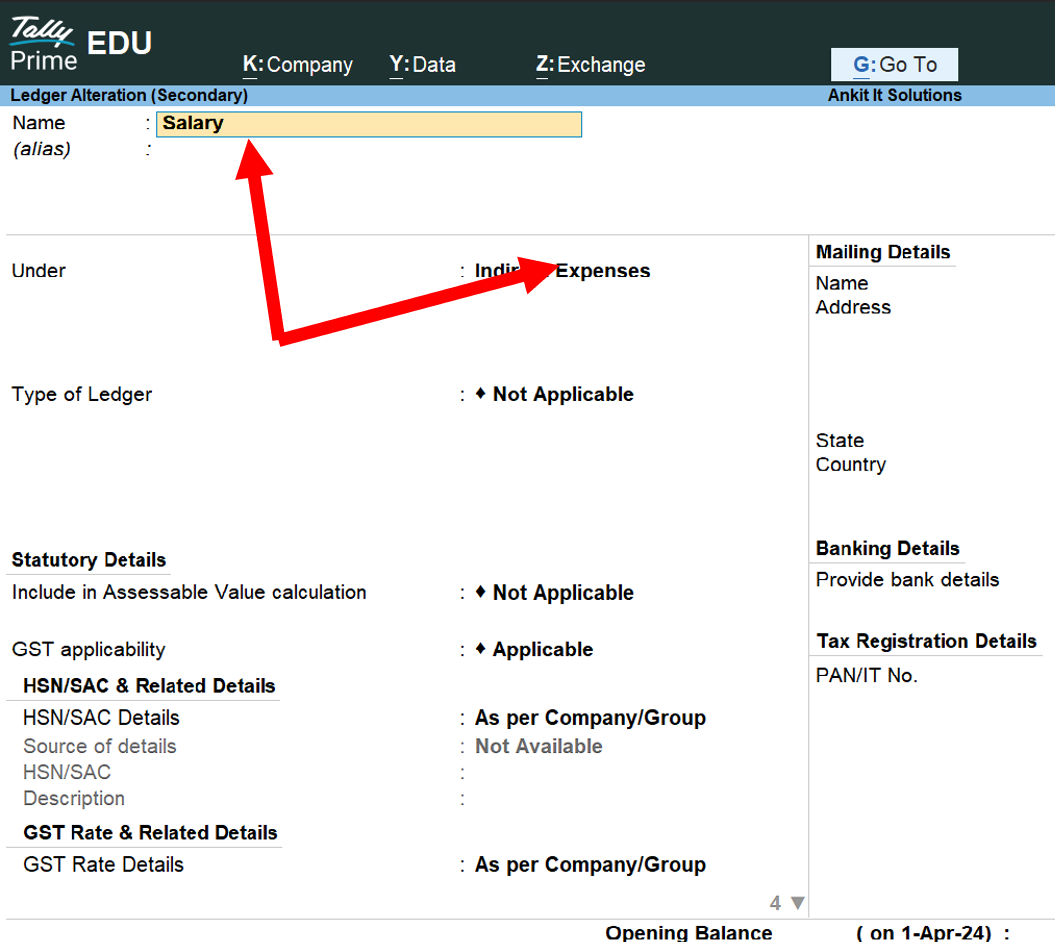
Create Ledger
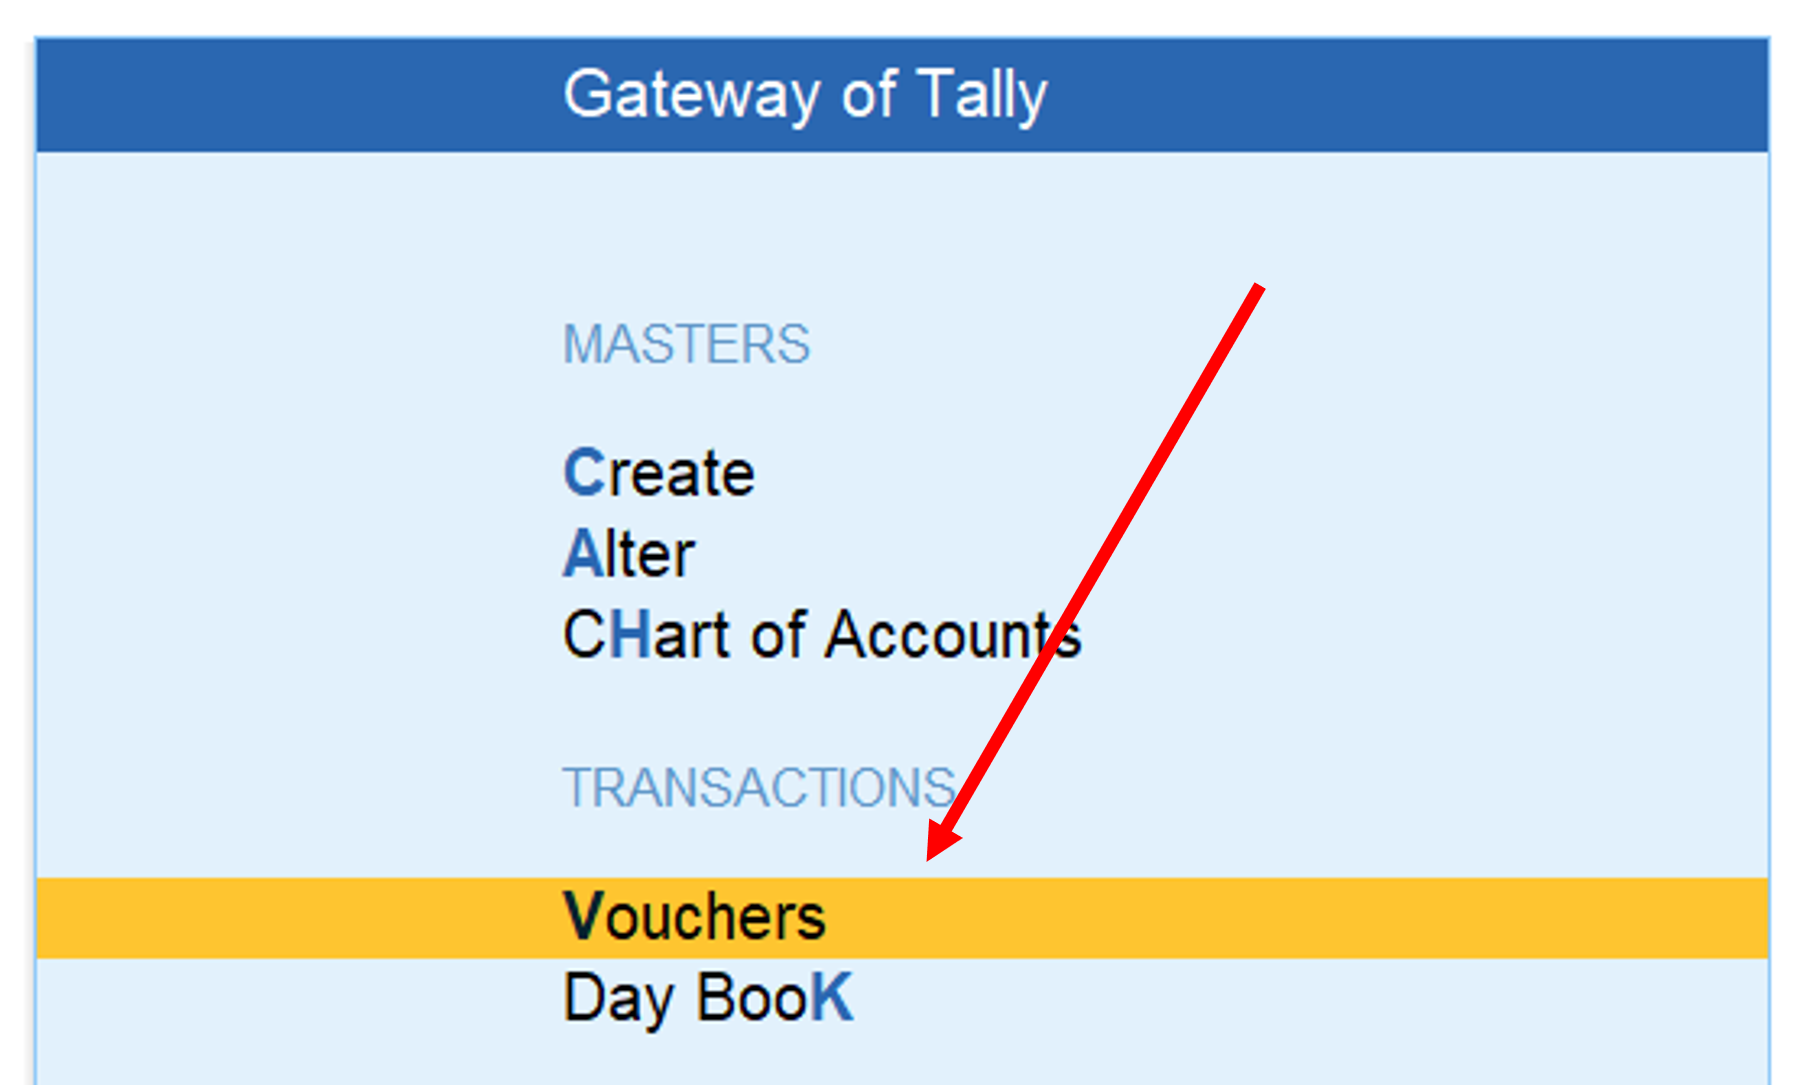
Click on Vouchers
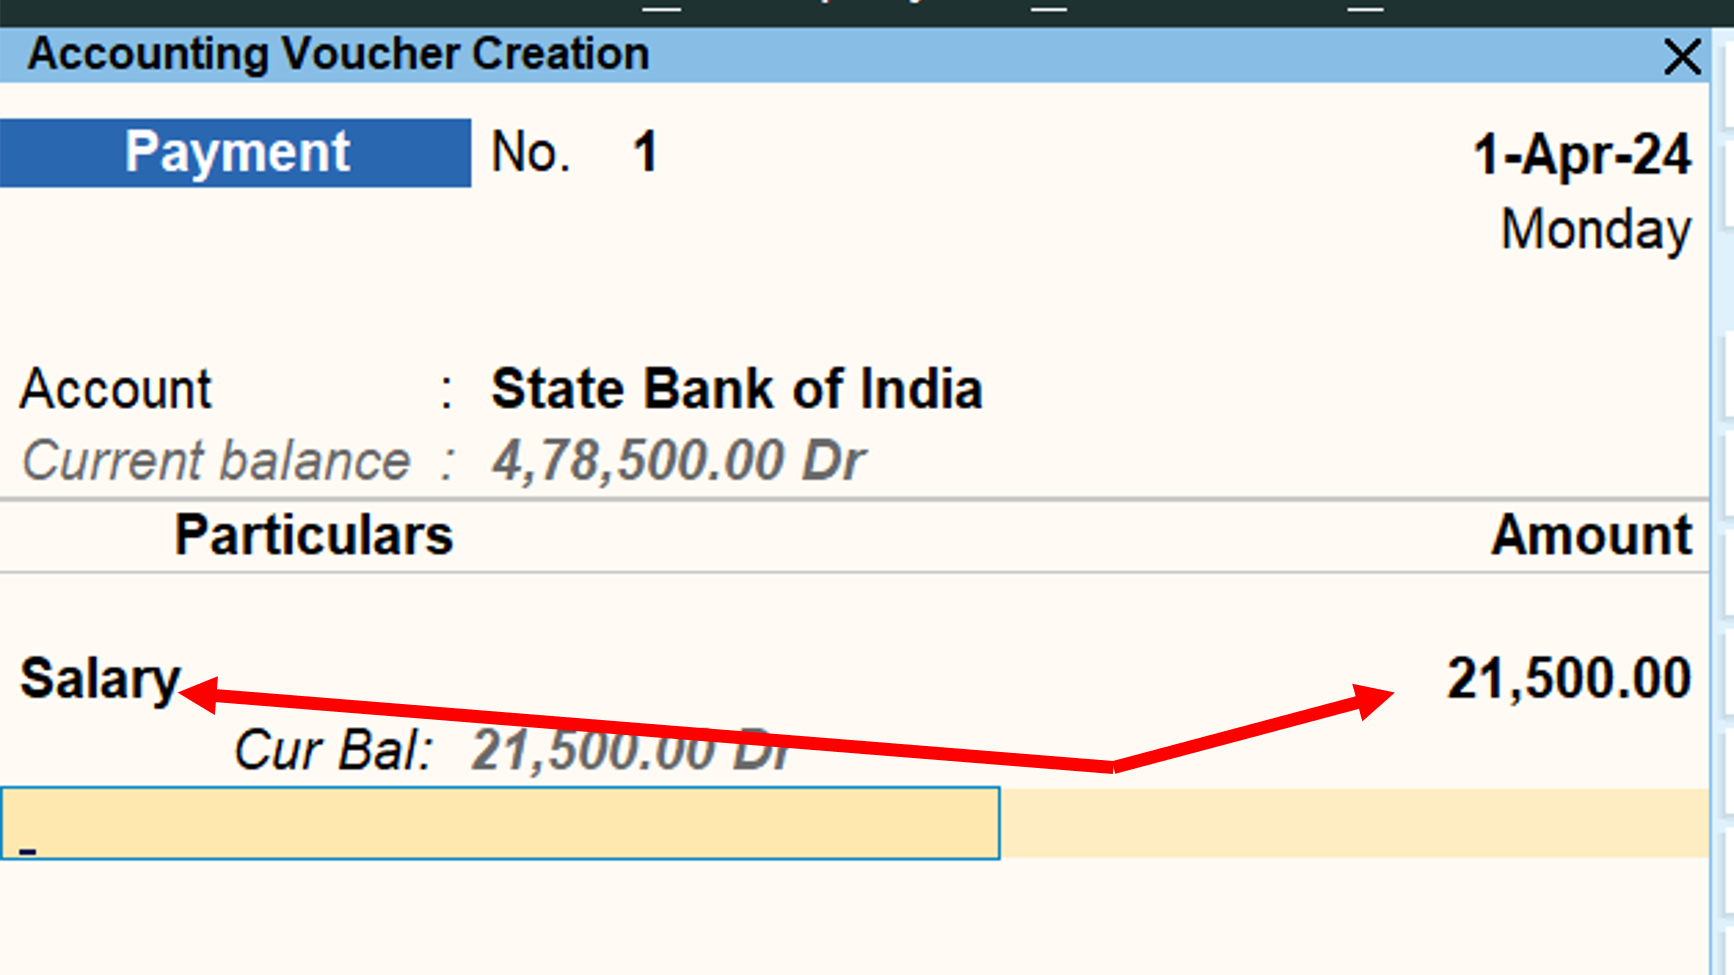
Payment Voucher Made
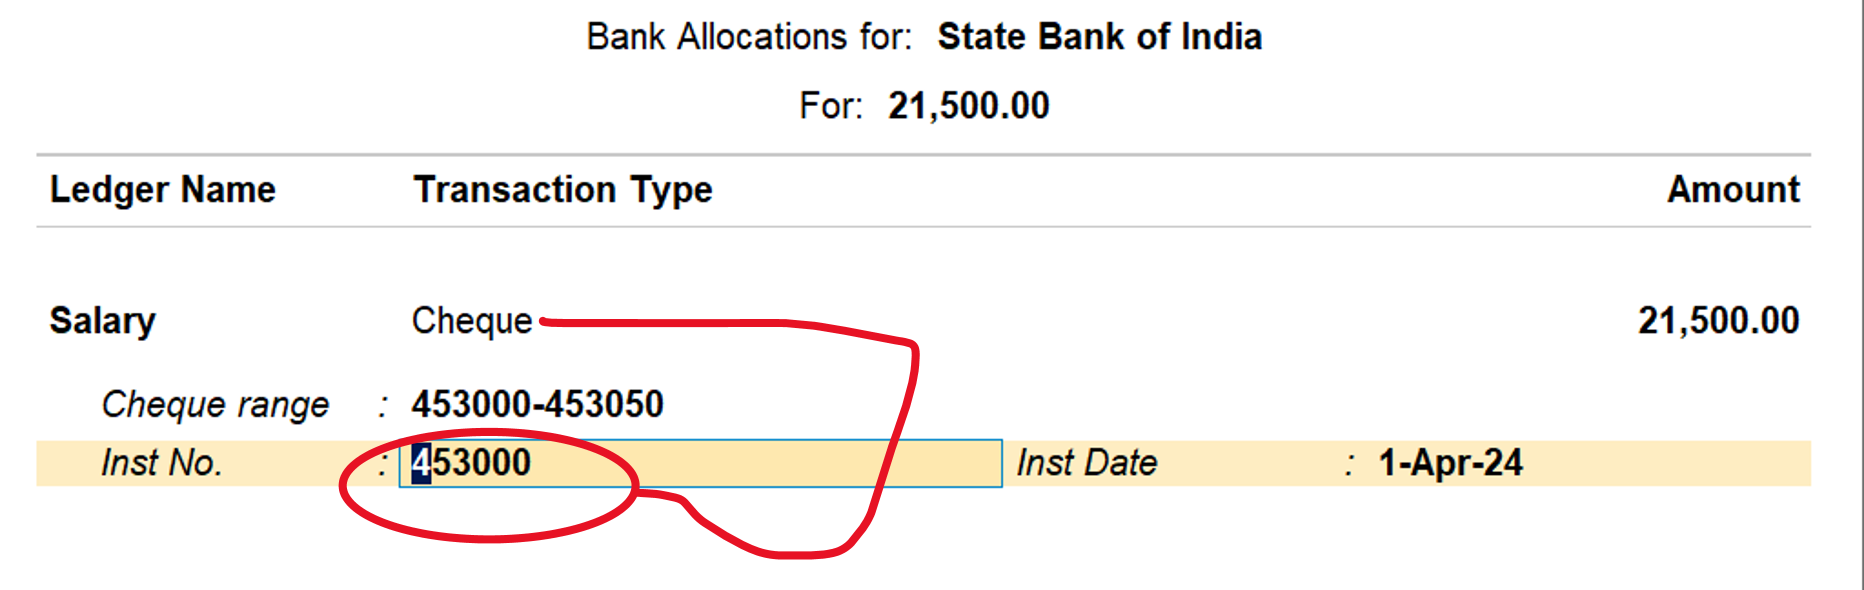
Cheque References
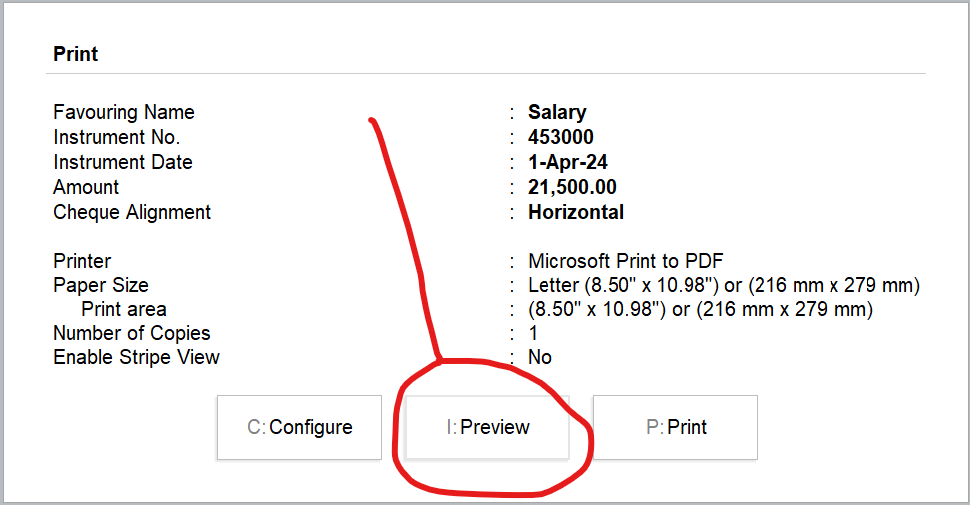
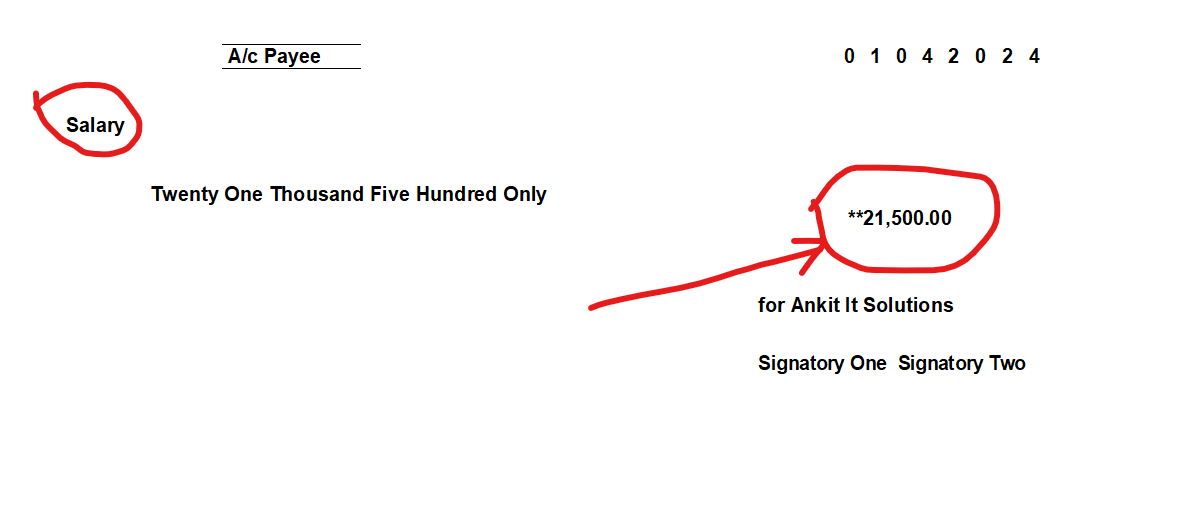
Preview
Cheque Issued Payment
Pass Another Entries like this….
1. Paid 15000 to Rahul Narayana Pvt Ltd by Cheque No 150201
2. Paid Salary to Sangam Ompuri by Cheque No 150202
3. Paid 5000 Advertisement Fee to Suresh Banshal by Cheque No 150203
4. Paid 5600 Light Bill by Cheque No 150205
5. Paid 7500 to Transport Charge by Cheque No 150206